If your anthurium — a tropical plant famous for its waxy, heart-shaped flowers and velvety collector foliage — has been sitting in the same bag of generic potting soil you bought at the hardware store, this article is for you. Anthuriums are aroids, a plant family that evolved on the forest floor where roots wrap around bark, breathe freely, and never sit in waterlogged ground. That origin story matters enormously when you’re building their soil mix at home. The “soil” they actually want is less like garden dirt and more like a loose, chunky blend of organic material and mineral grit that drains fast, holds just enough moisture, and lets air reach the roots constantly. Get that balance right and anthuriums reward you generously. Get it wrong — even slightly — and you’ll spend months wondering why the leaves yellow, the roots rot, or the plant just stalls. This guide walks through how to diagnose your current mix, fix the ratios, and match your ingredients to your specific conditions.
What Your Mix Is Actually Doing (and Where Most Mixes Fail)
Before adjusting anything, it helps to understand what a soil mix is managing simultaneously: water retention, aeration, and drainage. Those three forces are always in tension. Add more of one and you typically subtract from another.
The standard failure mode for anthurium mixes is too much fine-particle material relative to coarse structure. Standard peat-heavy potting mixes — even premium brands — are formulated for a broad range of houseplants that tolerate moderate drainage. Anthuriums, particularly collector cultivars like Anthurium crystallinum, A. clarinervium, or the increasingly sought A. warocqueanum, have roots that are far more sensitive to sustained moisture than those mixes account for.
The University of Florida IFAS Extension’s anthurium production document specifically flags “poorly drained media” as a primary cause of Phytophthora and Pythium root rot — two fungal pathogens that become nearly impossible to reverse once established in a mature root system. The fine print matters: it’s not that peat is bad, it’s that peat without adequate coarse counterweight creates anaerobic (oxygen-deprived) pockets that are a direct invitation to these pathogens.
The second failure mode is the opposite: over-correcting toward a mix so coarse and fast-draining that moisture exits before roots can absorb it. This shows up as chronic wilting between waterings even when you’re watering on schedule, and tips that brown faster than the plant can push new growth.
Your goal is a mix that:
- Drains completely within 30–60 seconds of watering
- Feels damp but not wet 24 hours later
- Has visible air pockets when you look at a handful
If your current mix doesn’t pass that informal test, you’re likely in one of these two failure zones.
The Perlite Ratio Decision: What the Numbers Actually Mean
Perlite is the white, popcorn-like volcanic mineral you’ve probably seen in any potting mix. It doesn’t compact, doesn’t decompose, and creates permanent air channels in whatever it’s blended with. For anthuriums, it’s non-negotiable — the question is how much.
By the numbers:
| Mix Profile | Perlite % | Bark % | Fine Organic % | Best For |
|---|---|---|---|---|
| Standard houseplant | 10–15% | 0% | 80–85% | Pothos, philodendron |
| Entry anthurium | 25–30% | 20% | 45–55% | A. andraeanum hybrids, moderate humidity |
| Collector/velvety-leaf | 35–40% | 30–35% | 25–30% | A. crystallinum, A. warocqueanum, high-humidity setups |
| Mounted/semi-epiphytic | 40–50% | 40–50% | 5–15% | Rare species, greenhouse environments |
The CTAHR Anthurium Production in Hawaii publication recommends a growing medium with high porosity and a pH between 5.5 and 6.5 — a range that most commercial potting mixes will drift above over time as minerals accumulate. Worth testing your mix’s pH every 6 months if you’re running collector-grade specimens.
The practical decision rule for perlite:
- If you’re growing in a humid environment (Hawaii outdoors, Florida, enclosed greenhouse) and watering on feel rather than schedule: 35–40% perlite minimum. Humidity keeps the surface of the mix reading “dry” while the interior stays wet longer than you’d expect.
- If you’re growing on a mainland windowsill or under grow lights with lower ambient humidity and faster evaporation: 25–30% perlite is usually sufficient, and going higher risks drying out too fast between waterings.
- If your anthurium is in a terracotta pot: reduce perlite by 5–10 percentage points compared to a plastic or glazed ceramic pot. Terracotta wicks moisture aggressively, doing some of the drainage work for you.
The Spruce’s anthurium growing guide echoes this logic, noting that pot material is a frequently overlooked variable in moisture management — a reminder that your mix ratio and your container are a system, not independent choices.
Bark Chunk Size: The Variable Nobody Talks About Enough
If perlite controls air and drainage, bark chunk size controls the structural skeleton of your mix and how roots actually navigate through it. This is where a lot of intermediate growers stall — they’ve figured out perlite ratios but are buying whatever orchid bark is on the shelf without considering the chunk size printed on the bag.
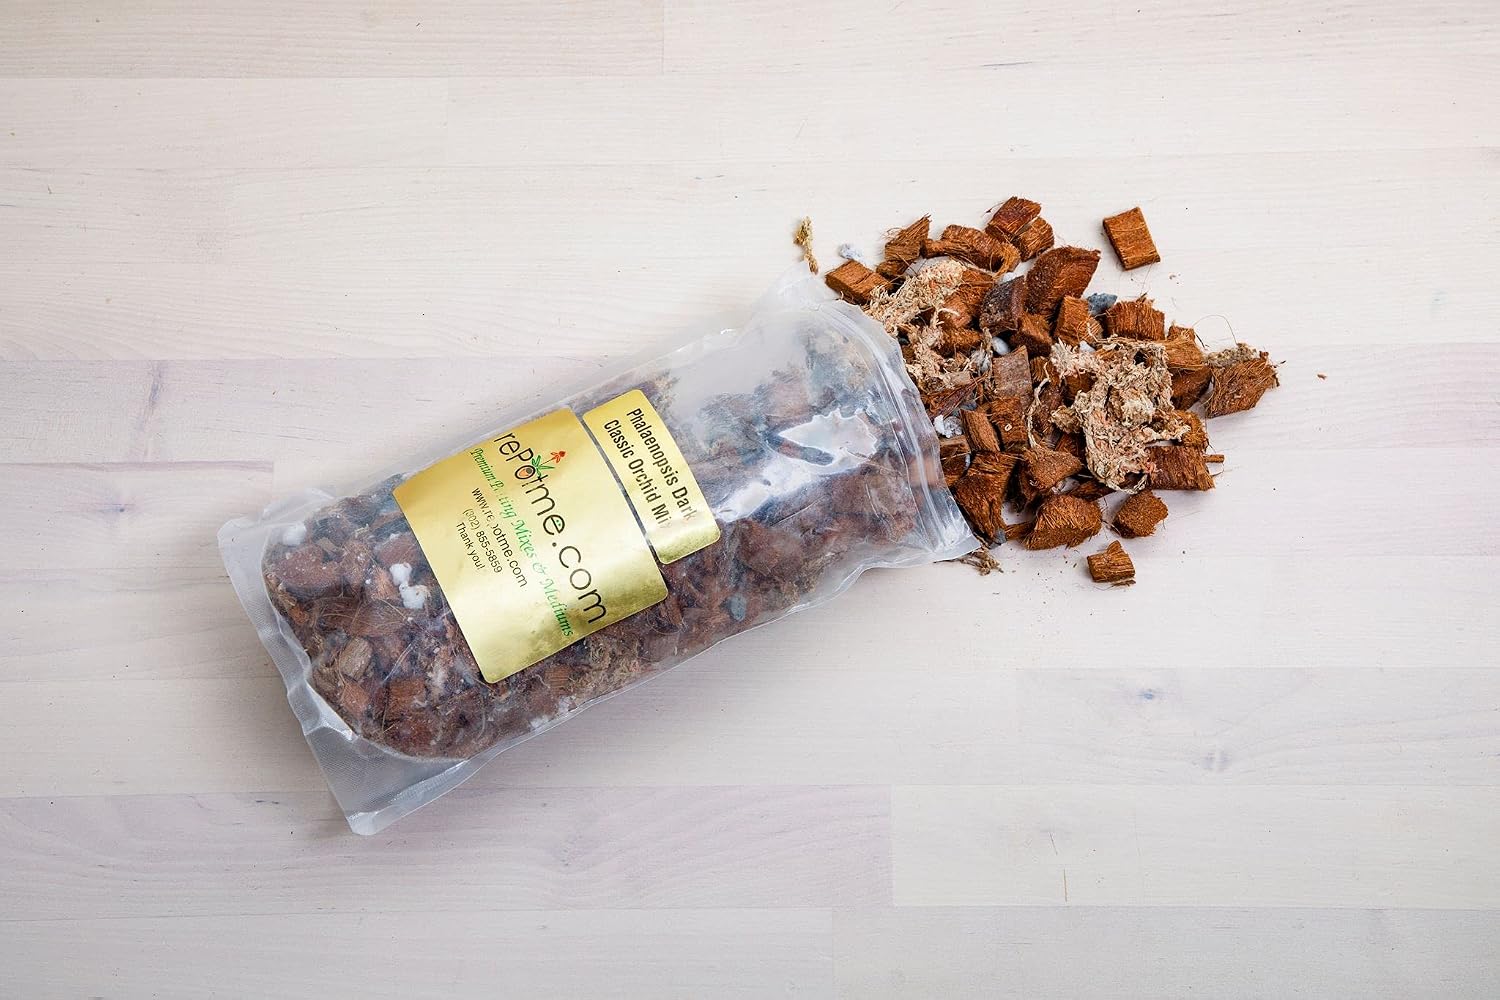
Bark (typically fir bark or pine bark, sold in fine, medium, and coarse grades) serves two roles in an anthurium mix: it creates physical structure that resists compaction over time, and it provides a slightly acidic, organic surface that beneficial microbes colonize. Over 12–18 months, bark breaks down, which is why mixes need refreshing — the structure collapses and the mix starts behaving like that heavy, poorly-drained generic potting soil you started with.
Fine bark (under ¼ inch / ~6mm): Integrates more like a soil amendment than a structural component. It improves drainage over pure peat but compacts within 8–12 months and doesn’t maintain long-term air channels. Best used in small proportions (10–15%) for A. andraeanum hybrids grown as landscape or patio plants that get repotted on a regular annual schedule.
Medium bark (¼ to ½ inch / 6–12mm): The practical sweet spot for most collector anthuriums in 4–8 inch pots. Provides visible air channels, resists compaction for 12–18 months, and allows roots to wrap and anchor naturally. Fine Gardening’s guide on tropical potting mixes consistently positions medium orchid bark as the default structural component for aroid mixes, precisely because it balances longevity with particle size appropriate to typical root diameters.
Coarse bark (½ inch and up / 12mm+): Appropriate for larger specimens in 10-inch-plus pots, greenhouse-grown plants, or semi-mounted applications. In a standard 6-inch pot, coarse bark leaves too much empty airspace relative to root density, drying the mix unevenly and making consistent watering harder. If you’ve ever had an anthurium where some roots were desiccated and others sitting in wet pockets within the same pot, particle size mismatch is a likely cause.
Missouri Botanical Garden’s anthurium care notes reinforce that the mix should be “loose and well-draining” — a description that sounds simple but translates directly into medium bark as the structural anchor in most home growing scenarios.
Diagnosing Your Current Mix Without Starting Over
Before you empty every pot and start fresh, run this diagnostic sequence on your current setup:
Step 1 — The soak test. Water thoroughly until it runs from the drainage holes. Time it. If water pools on the surface for more than 15–20 seconds before absorbing, your fine-particle ratio is too high. If it runs through in under 5 seconds without any resistance, your mix may be too coarse and water is channeling rather than absorbing.
Step 2 — The 24-hour poke test. Stick your finger an inch into the mix 24 hours after watering. Damp is correct. Wet means retention is too high. Bone dry means retention is too low, and you’ll be watering more often than the plant benefits from.
Step 3 — Root inspection at next repot. Healthy anthurium roots are white to tan and slightly firm. Brown, mushy roots indicate rot from excess moisture. Dry, papery roots indicate the mix is drying out too aggressively or the perlite ratio is too high for your conditions.
Amendment without full repot: If your mix is too dense, you can top-dress with a ½-inch layer of coarse perlite and medium bark, then work it lightly into the surface at the next watering. It won’t transform the entire root zone but it improves surface aeration while you plan the next full repot. Extension.ufl.edu’s anthurium production guidance suggests media amendments are most effective during active growth periods — in most mainland climates, that means spring through early fall when root metabolism is highest.
If X, Then Y — The Decision Framework
You’re building or adjusting a mix right now, probably with a decision pending. Here’s where to land:
If your anthurium has yellowing lower leaves and roots that look brown at the tips: Your mix is retaining too much moisture. Increase perlite to the next tier (if at 20%, go to 30%; if at 30%, go to 40%) and switch to medium bark if you’ve been using fine.
If your anthurium wilts between waterings despite moist-feeling soil: You have a root rot problem, not a watering problem. The roots can’t absorb water because they’re already compromised. Full repot into a fresh, higher-perlite mix with a fungicide drench is the intervention — adjusting ratios without addressing the roots won’t recover the plant.
If your anthurium is stable but not pushing new leaves after 3+ months: The mix has likely compacted and lost its air channel structure. Bark breakdown is the cause. Repot into fresh medium bark-based mix; you don’t necessarily need to change your ratios, just renew the material.
If you’re growing a high-value collector cultivar (A. warocqueanum, A. crystallinum, or any velvety-leaf species purchased from specialty growers) in a non-climate-controlled mainland environment: Default to 35–40% perlite, medium bark at 30%, and the balance in coco coir rather than peat for better long-term pH stability. That mix is more forgiving across seasonal humidity swings than any peat-forward blend.
The substrate you choose isn’t a permanent commitment — anthuriums respond well to repotting every 12–18 months. Think of each repot as a reset point where you can dial the ratios tighter based on what the roots told you during removal. The growers who get consistently beautiful results aren’t running a perfect mix from day one; they’re reading the plant, adjusting the variables, and iterating each cycle.